Spiderverse Shader 
A shader inspired by Spiderman: Into the Spiderverse (Unity/HLSL)
In this tutorial we will try to achieve one of the effects seen in Into the Spiderverse: the Ben-Day Process named after Benjamin Henry Day Jr. It has an early comic book style of shading with dots when an object is exposed to light, and lines when it is not.
Let's get right into it.
The tutorial for this shader is going to be divided into 4 sections:
- Patterns
- Screenspace Texturing
- Hooking it all up
- Final Touches
Patterns
At the crux of the effect is drawing circles and lines. So let's start with simple code to draw circles and lines on a single uv-texture
uv-texture
float circle(float2 uv, float radius) {
float d = distance(uv, float2(0.5, 0.5));
return step(d, radius);
}
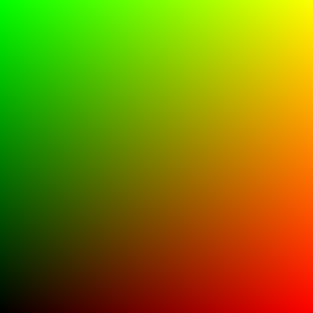
As you might know, the x and y-axes of the uv-texture range from 0 to 1 starting from the bottom left.
This function checks the distance between the current uv-coordinate and the center of the uv-texture (0.5, 0.5), and then compares that distance with the desired radius (also ranging from 0 to 1). If we find that the current point is within the radius, this function returns 1, 0 otherwise.

At the beginning, there was a circle
Then we setup a function that draws a line. This is fairly simple and very similar to the circle function.
float line(float2 uv, float d) {
return step(uv.x, d);
}

And a line
In fairness, this looks like a function that divides the uv-texture into 2 parts on the x-axis; and it is. Why it works for as a line drawer will become clearer.
Now we look at the initial canvas of a uv-texture again. We already know how to draw circles and lines on them, so let's figure out how to repeat them.
and we're back...
float2 pattern(float2 uv, float k) {
return frac(uv*k);
}
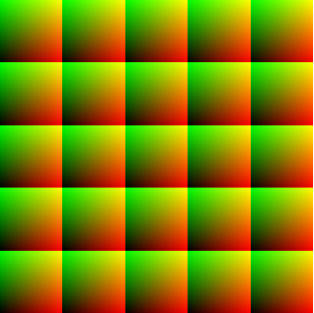
Scale Factor of 5
The pattern function receives a uv-texture and returns a patterned uv-texture. It works by scaling each axis on the uv-texture by k, and then returns the fractional part (between 0 and 0.99) of each whole number interval between 0 and k. Since each of the 2 axes of the uv-texture is patterned k times, we get a k-squared grid.
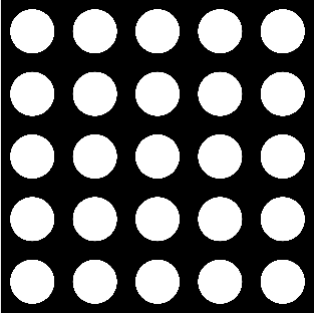
Circles plotted on a patterned uv-texture

Lines plotted on a patterned uv-texture
Screenspace Texturing
Now that we understand how to draw circles and lines on a single and patterned uv-texture, we look at how we can get a patterned, flat texture onto a 3D model.
struct Input {
float2 uv_MainTex;
float3 vertex;
float3 viewDir;
float3 vertexNormal;
float4 screenPos;
};
void surf (Input IN, inout SurfaceOutputStandard o) {
float4 tex = tex2D(_MainTex, IN.uv_MainTex);
o.Normal = UnpackNormal(tex2D(_BumpMap, IN.uv_BumpMap));
o.Alpha = 1;
}
Psychedelic!
In the surface shader above, we start by plugging the screen coordinates into the red and green channels of the Albedo in order to debug it. We can see that the patterned uv-textures appear on the model, but they seem to be stretching and bending. This is because we are viewing the model with a perspective camera and the screen space position has not undergone perspective divide yet.
void surf (Input IN, inout SurfaceOutputStandard o) {
float4 tex = tex2D(_MainTex, IN.uv_MainTex);
o.Albedo = float3(pattern(textureCoordinates, 50), 0);;
o.Normal = UnpackNormal(tex2D(_BumpMap, IN.uv_BumpMap));
o.Alpha = 1;
}

Closer!
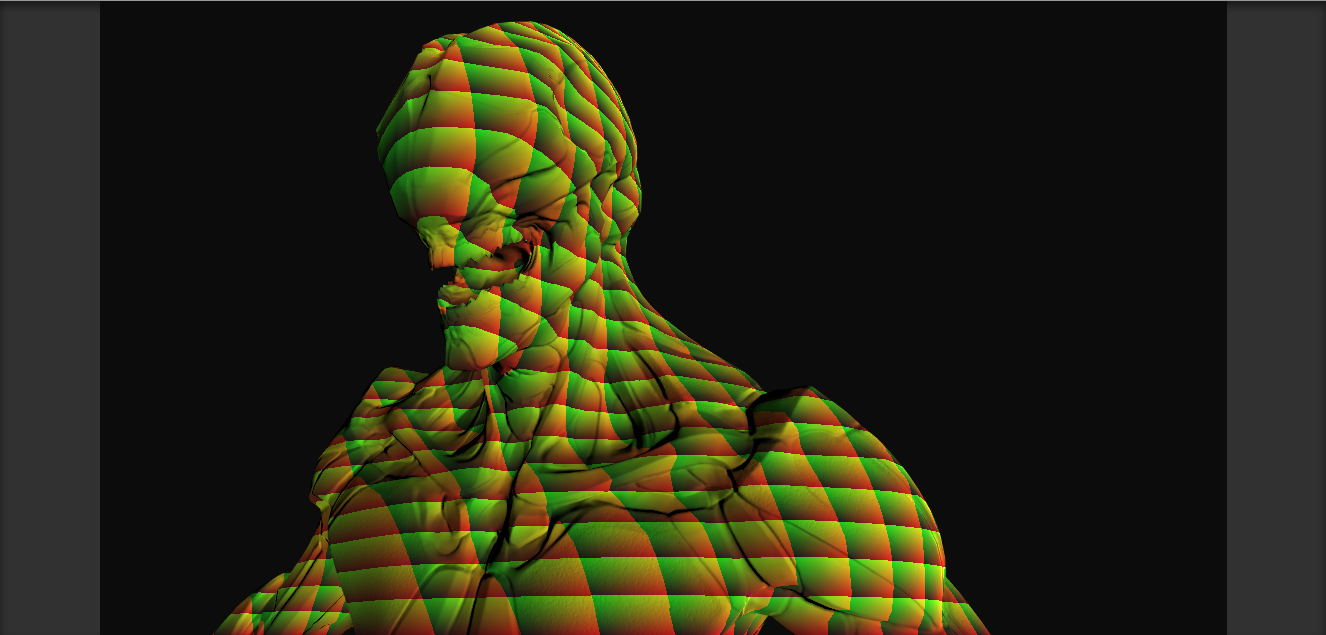
We see now that the uv-texture pattern is no longer warped, but we also notice that the x-axes on the uv-textures are longer than the y-axes, giving it a rectangular shape. This is because the current aspect ratio of the screen is 16:9 (i.e not 1:1, which is what the uv-textures are). We rescale the x-coordinate of the uv-coordinates by multiplying it by this ratio.
void surf (Input IN, inout SurfaceOutputStandard o) {
float4 tex = tex2D(_MainTex, IN.uv_MainTex);
float2 textureCoordinates = IN.screenPos.xy / IN.screenPos.w;
o.Albedo = float3(pattern(textureCoordinates, 50), 0);;
o.Normal = UnpackNormal(tex2D(_BumpMap, IN.uv_BumpMap));
o.Alpha = 1;
}
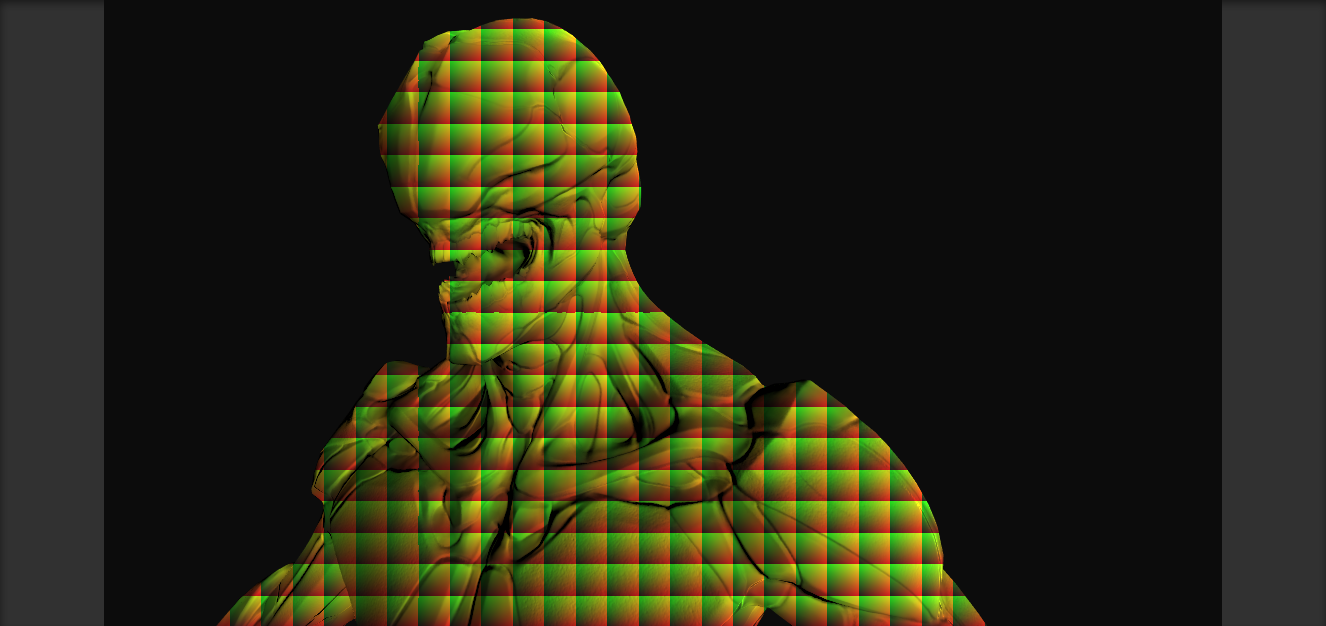
...and then there were squares!
We are now done debugging the uv-coordinates, we want to pass them on to the lighting function. For this we need to define our own surface shader output. We also change the inout parameter of the surface shader, pass the actual fragment colors to the Albedo, and pass the processed uv-coordinates to the lighting function.
struct SurfaceOutputCustom {
fixed3 Albedo;
fixed3 Normal;
fixed3 Emission;
fixed Alpha;
float2 textureCoordinates;
};
float4 tex = tex2D(_MainTex, IN.uv_MainTex);
float2 textureCoordinates = IN.screenPos.xy / IN.screenPos.w;
float aspect = _ScreenParams.x / _ScreenParams.y;
textureCoordinates.x = textureCoordinates.x * aspect;
o.Normal = UnpackNormal(tex2D(_BumpMap, IN.uv_BumpMap));
o.Alpha = 1;
}
Hooking it all up
We need decide when to draw circles, when to draw lines, and how to blend it all together. Our initial lighting function may look like this. It is a very common ambient and diffuse lighting function:
half4 LightingCustom (SurfaceOutputCustom s, half3 lightDir, half3 viewDir) {
float2 st = s.textureCoordinates;
float NDotL = dot(s.Normal, lightDir);
half diff = max (0, NDotL);
half4 col;
half3 l = (s.Albedo * _LightColor0.rgb * diff + _AmbientColor * _AmbientStrength);
col.rgb = l;
col.a = s.Alpha;
return col;
}
Let's create 2 separate variables for scaling the uv-coordinates by some amount and then use each of them independently to draw lines and circles.
float2 st = s.textureCoordinates;
In the general technique of the Ben-Day process, the radius of the circles is wider where there is more exposure to light. We have the perfect candidate for this: NDotL . We also want to draw lines where there is little to no exposure to light. We also have the perfect candidate for that: -NDotL.
float2 st = s.textureCoordinates;
float2 cst = pattern(st, _cScale);
float2 lst = pattern(st, _lScale);
float NDotL = dot(s.Normal, lightDir);
// circle pattern
// line pattern NDotL*-1 to draw these where the sun dont shine.
Now, we need to blend this all together. We instantiate a variable called eff, which essentially tracks where the circles or lines effect takes place. We want to use the lighting function colour when neither is to be drawn, white when we want to draw circles, and black when we want to draw lines.
We put everything together in a blending function so that we can show the progress so far.
half diff = max (0, NDotL);
half4 col;
half3 l = (s.Albedo * _LightColor0.rgb * diff + _AmbientColor * _AmbientStrength);
col.a = s.Alpha;
return col;
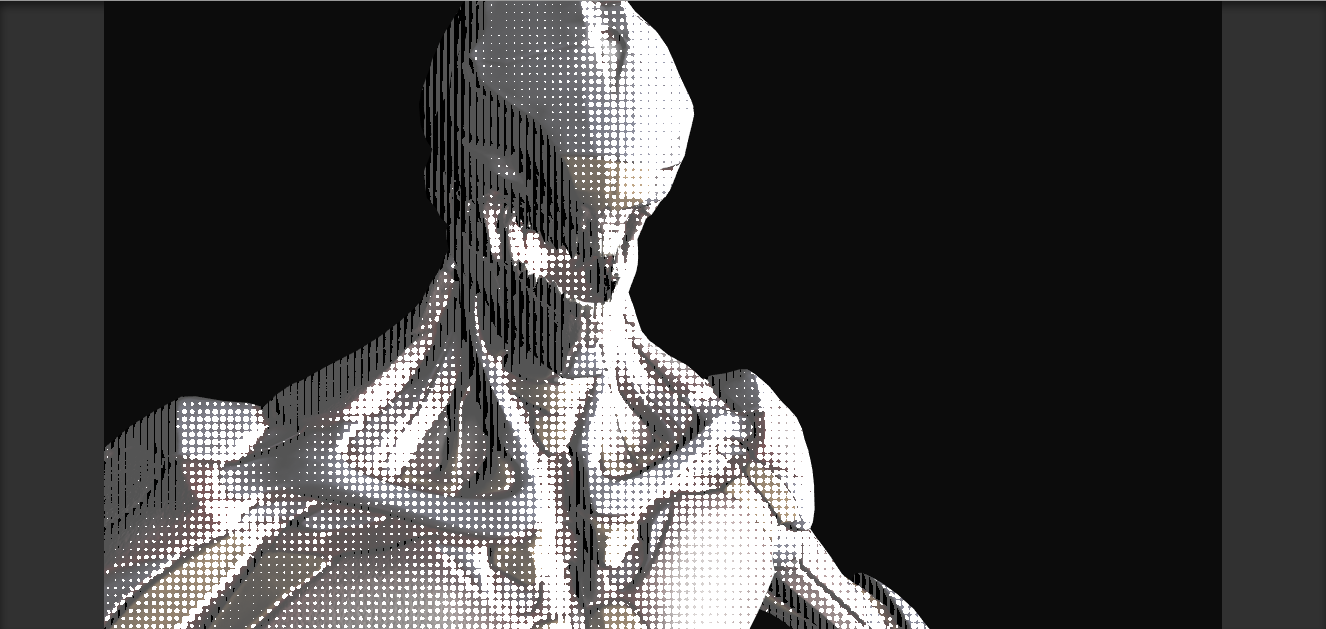
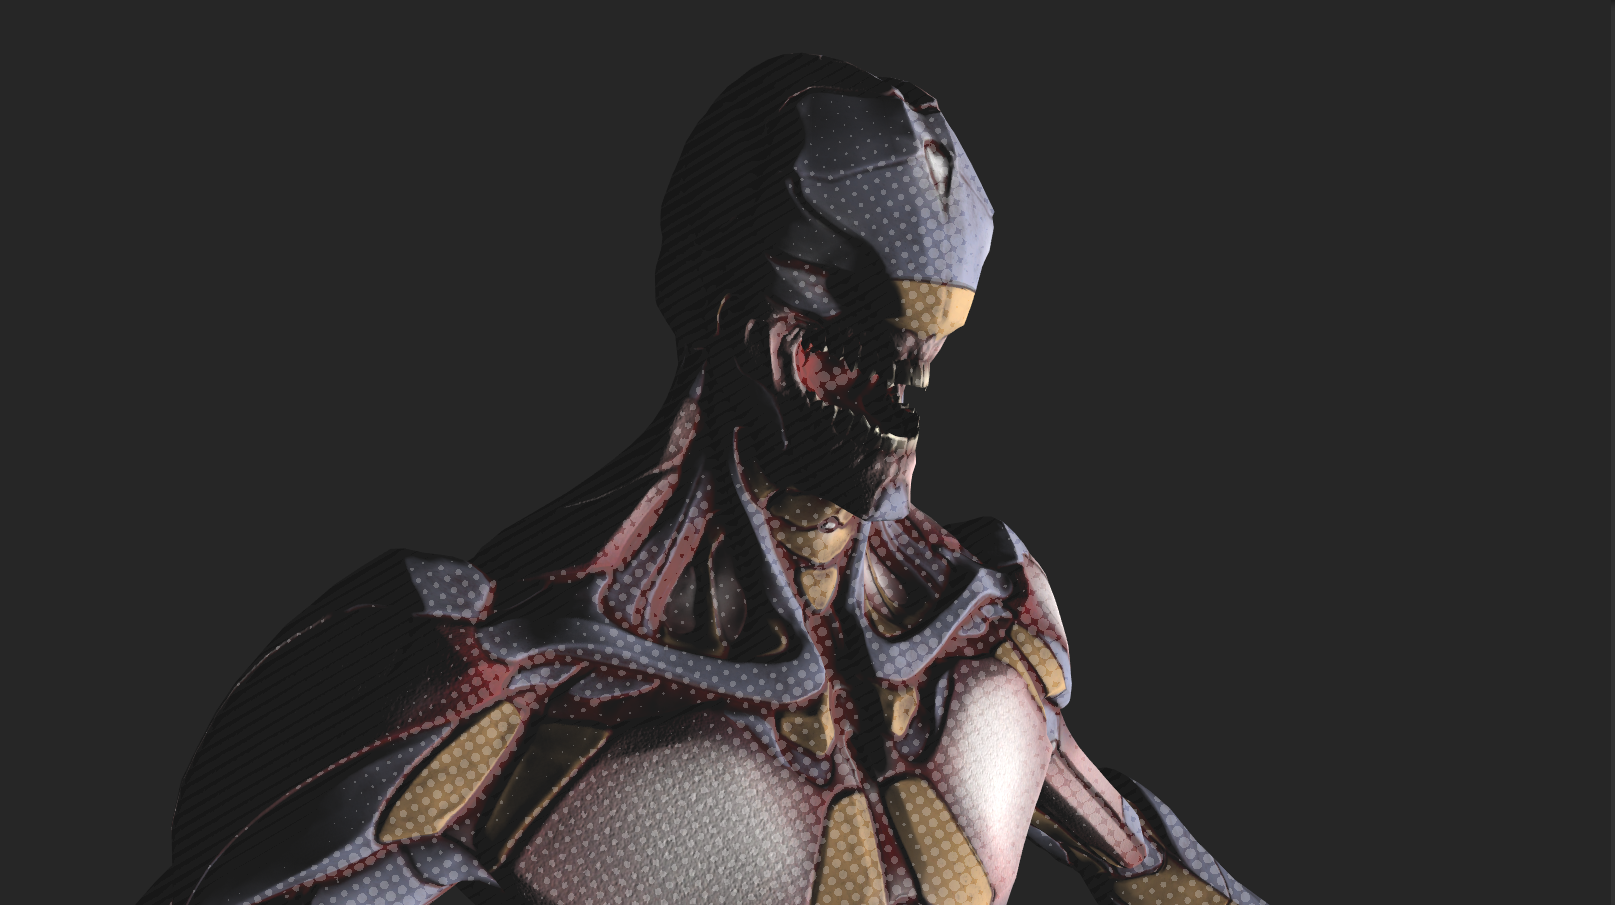
Mild success! Our favourite kind!
Final Touches
We add final touches to complete the effect. Initially, we chose to draw the circles white and the lines black. Let's instead make whatever the lighting function comes back with lighter when we draw circles, and darker when we draw lines.
half3 l = (s.Albedo * _LightColor0.rgb * diff + _AmbientColor * _AmbientStrength);
Next, we want to be able to rotate the cirlces and lines by some factor, for that we add a rotation function, which like the pattern function, receives the uv-texture and returns it after rotating by some angle, theta.
float2 rotate(float2 uv, float theta) {
return float2(uv.x * cos(theta) - uv.y * sin(theta),
uv.x * sin(theta) + uv.y * cos(theta));
}
float2 cst = pattern(st, _cScale);
float2 lst = pattern(st, _lScale);

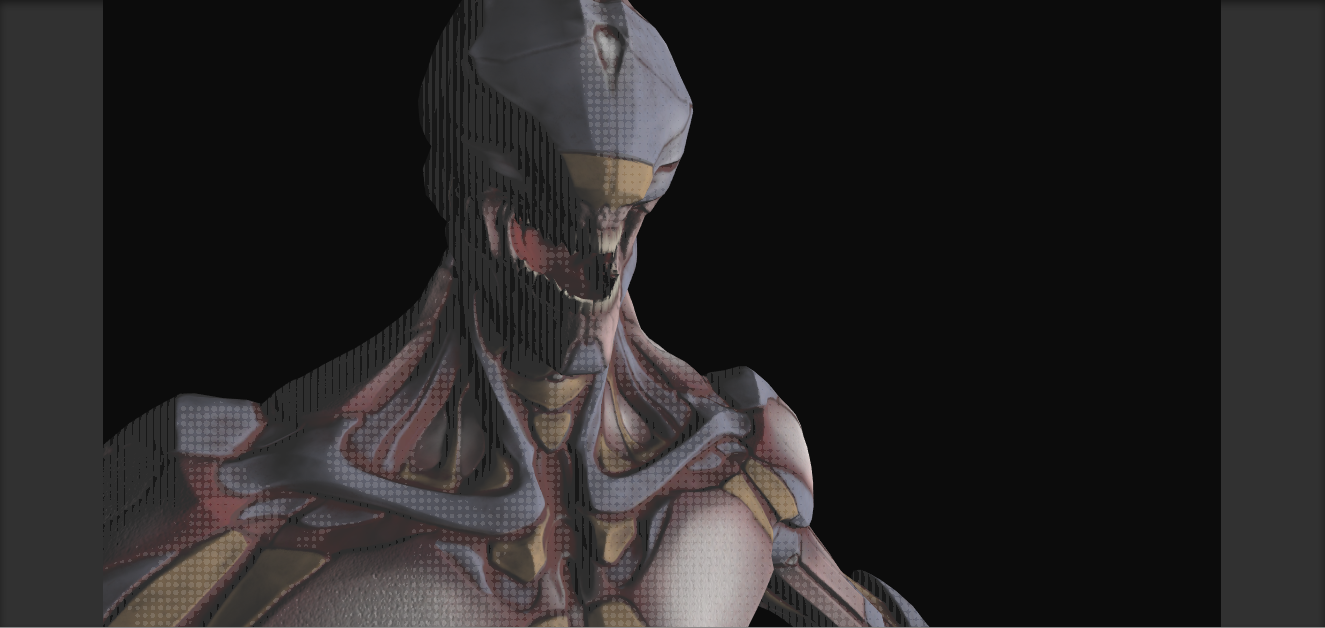
and we're done!
The full shader and sample scene can be found in this repository. Thanks for tuning in, until next time!
Resources: